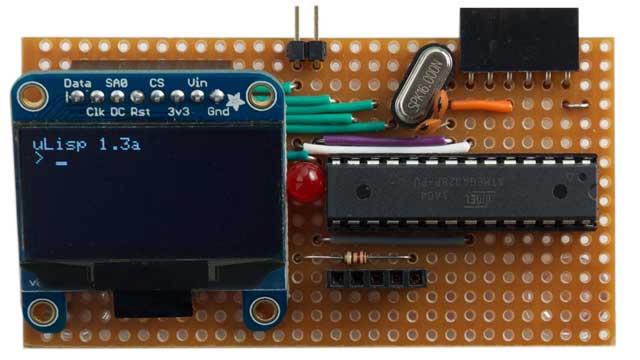
Run lisp on Arduino using OpenBSD

I have been fascinated by the ulisp project for some time.
It seems attractive to be able to run a high level language on target using a REPL on a small embedded device.
So I thought I would try it out on an old Arduino board using OpenBSD as host.
These notes assumes OpenBSD 6.4 on the host.
Install arduino on OpenBSD
It turned out the running arduino on OpenBSD is really straight forward.
The process is explained in quite detail in Arduino Development using the OpenBSD CLI.
To install the environment just install package arduino.
# pkg_add arduino
See an intro to the package in:
less /usr/local/share/doc/pkg-readmes/arduino
less /usr/local/share/doc/pkg-readmes/avrdude
Deploy ulisp
Next I created a sample project
arduinoproject ulisp-uno
cd ulisp-uno
I first tried to build and deploy the helloworld.ino source from the link above copied into ulisp-uno.ino.
make
After connecting the board with a USB printer cable I could deploy the hex file.
doas make upload
doas (sudo alternative) is needed for USB access. This makes the arduino blink a LED in a nice and soothing pace.
Next I tried to build ulisp.
wget https://raw.githubusercontent.com/technoblogy/ulisp/master/ulisp.ino
mv ulisp.ino ulisp-uno.ino
Here I got some compile errors that needed to be fixed.
- Some added forward declarations
- A new include file
eeprom.h - A commented out
yield()call
I also added some libraries to the Makefile.
LIBRARIES=SPI EEPROM
See https://github.com/peterljung/ulisp for details.
So after another make/upload ulisp was running on the Arduino.
To connect to the device i used cu serial terminal emulator.
cu -s 9600 -l /dev/cuaU0
See Using ulisp for some guidance on how to use the on target repl environment. Here is a sample session.
uLisp 2.6
314> (+ 451 42)
493

314> (defun b () (pinmode 13 t) (loop (digitalwrite 13 t) (delay 500) (digitalwrite 13 nil) (delay 500)))
b

279> (b)
Error: Escape!
The second example is the corresponding blinking hello world in lisp! You escape a running command with ~. You escape the cu serial terminal with ~. ENTER.
See ulisp Language Reference for a complete reference of available commands.
When you are satisfied with your program you can save the image (save-image) (i.e. current state) which you can optionally autorun on hardware reset. See Saving and loading images for more info.
Pretty awesome! But now I wonder if this is something to be used for real deployments?
You can certainly have some serious fun with this ...
Install ulisp on 8266 NodeMCU v0.9 on macOS and Arduino IDE
Install CH340 driver on macOS.
Install python3.
-
Download the latest version for Mac OS X
/usr/local/bin/python3 --version
Install Arduino IDE.
Install support for NodeMCU board support in Arduino IDE.
Select the following to test the board:
- Board: NodeMCU 0.9 (ESP-12 module)
- Port: /dev/cu.wchusbserial
- Example: 8266/Blink
But the LED_BUILTIN is not set correctly for some reason. Internal LED is connected to GPIO01 which can also can referenced by 1, D7 (external port name) or GPIO01. Check pinout here.
// const int LED = 1;
// const int LED = D10;
const int LED = GPIO01;

pinMode(LED, OUTPUT);
...
Download ulisp and open .ino file in Arduino IDE.
Start serial monitor on 9600 baud.
uLisp 3.0
3071> (+ 1 1)
2
Done!
Try the examples.
Connect to local wifi.
(wifi-connect "SSID" "password")
Download time based on current IP.
(defun println (x s) (princ x s) (princ #\return s) (princ #\newline s))

(defun time ()
  (with-client (s "worldtimeapi.org" 80)
    (println "GET /api/ip HTTP/1.0" s)
    (println "Host: worldtimeapi.org" s)
    (println "Connection: close" s)
    (println "" s)
    (loop (unless (zerop (available s)) (return)))
    (loop
     (when (zerop (available s)) (return))
     (princ (read-line s))
     (terpri))))
Request page.
(time)
HTTP/1.1 200 OK
Connection: close
Server: Cowboy
Date: Sat, 22 Feb 2020 16:57:43 GMT
Content-Length: 346
Content-Type: application/json; charset=utf-8
Cache-Control: max-age=0, private, must-revalidate
Access-Control-Allow-Origin: *
Access-Control-Expose-Headers:
Access-Control-Allow-Credentials: true
Via: 1.1 vegur
{
	"week_number":8,
	"utc_offset":"+01:00",
	"utc_datetime":"2020-02-22T16:57:44.231964+00:00",
	"unixtime":1582390664,
	"timezone":"Europe/Stockholm",
	"raw_offset":3600,
	"dst_until":null,
	"dst_offset":0,
	"dst_from":null,
	"dst":false,
	"day_of_year":53,
	"day_of_week":6,
	"datetime":"2020-02-22T17:57:44.231964+01:00",
	"client_ip":"212.85.95.32",
	"abbreviation":"CET"
}
nil
Use a RTC clock.
; Control DS3231 over i2c (addr: 0x68)
; Datasheet: https://datasheets.maximintegrated.com/en/ds/DS3231.pdf
; NodeMCU 0.9 ESP-12 module
; D1 = GPIO5 = SCL
; D2 = GPIO4 = SDA
; See: http://www.ulisp.com/show?1EK4
:      http://www.ulisp.com/show?1DO6

; set time of DS3231
(defun set-time (hr min)
  (with-i2c (str #x68) 		;; start slave on addr 0x68
    (write-byte 0 str)    	;; slave address 00
    (write-byte 0 str)		;; set secs = 00
    (write-byte min str) 	;; set min
    (write-byte hr str)))   ;; set hr

; return time as (hr min)
(defun get-time ()
  (let (hr min)
    (with-i2c (str #x68)
      (write-byte 1 str) 			;; slave address 01
      (restart-i2c str 2)   		;; restart to read 2 bytes after write
      (setq min (read-byte str)) 	;; read min
      (setq hr (read-byte str)) 	;; read hr
      (list hr min))))

; set date as e.g. (set-date #x01 #x02 #x03 #x20) representing mon, 2nd march, 2020
(defun set-date (wday day mon year)
  (with-i2c (str #x68) 		;; start slave on addr 0x68
    (write-byte 3 str)    	;; slave address 03
    (write-byte wday str)	;; set weekday 01-07
    (write-byte  day str)	;; set day 01-31
    (write-byte  mon str)	;; set month 01-12
    (write-byte year str))) ;; set year 00-99

; return time as (hr min)
(defun get-date ()
  (let (wday day mon year)
    (with-i2c (str #x68)
      (write-byte 3 str) 			;; slave address 03
      (restart-i2c str 4)   		;; restart to read 4 bytes after write
      (setq wday (read-byte str)) 	;; read weekday
      (setq  day (read-byte str)) 	;; read day
      (setq  mon (read-byte str)) 	;; read month
      (setq year (read-byte str)) 	;; read weekday
      (list wday day mon year))))
